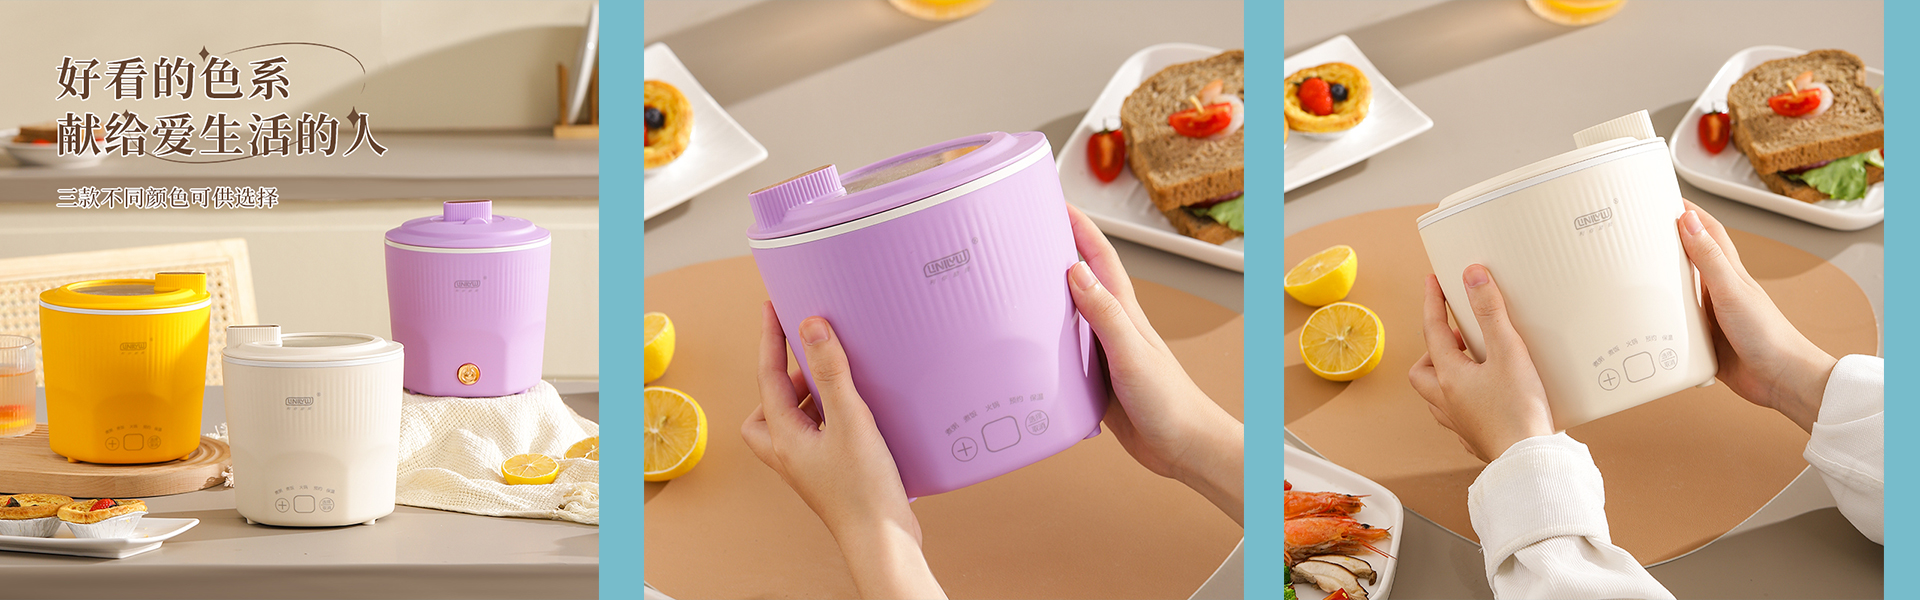
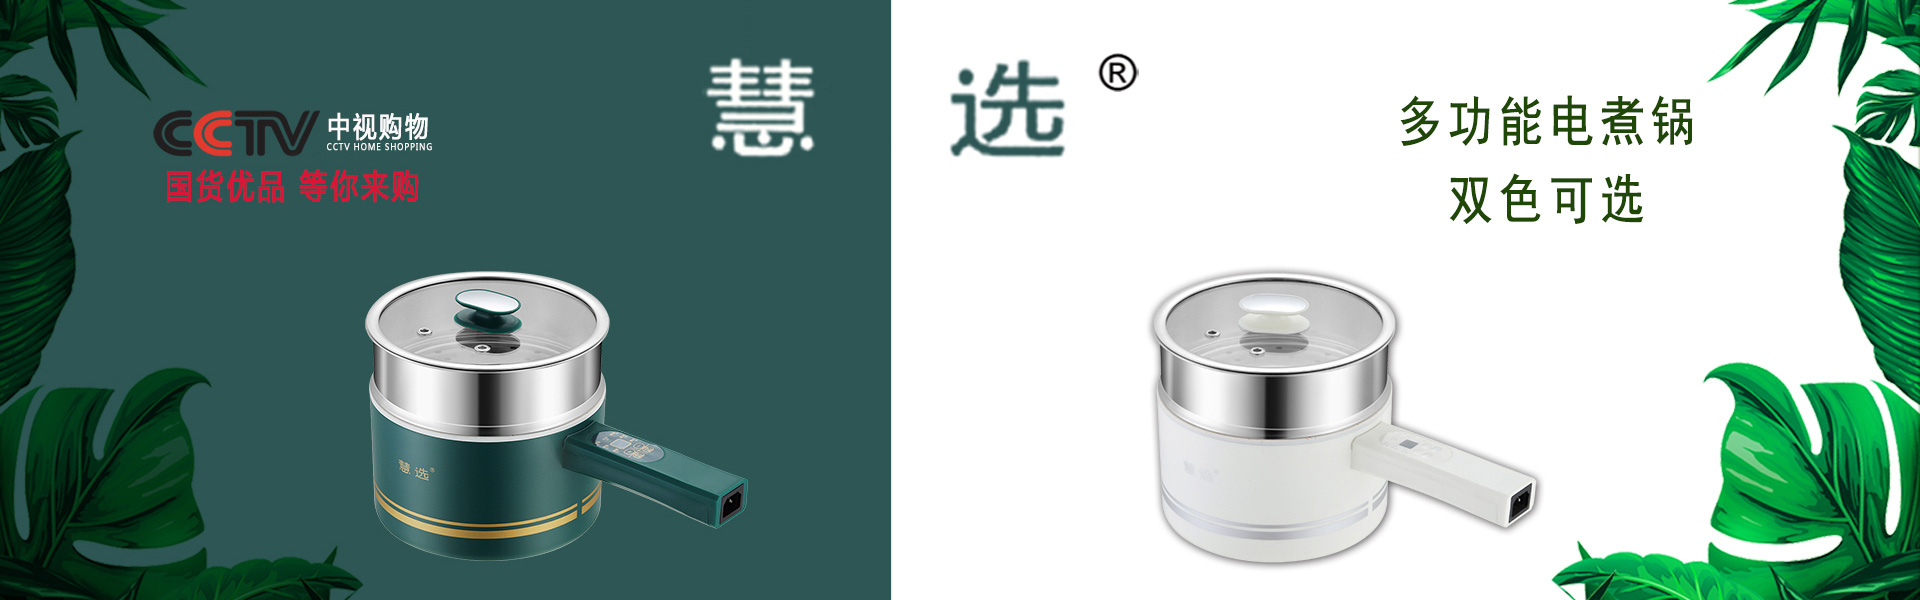
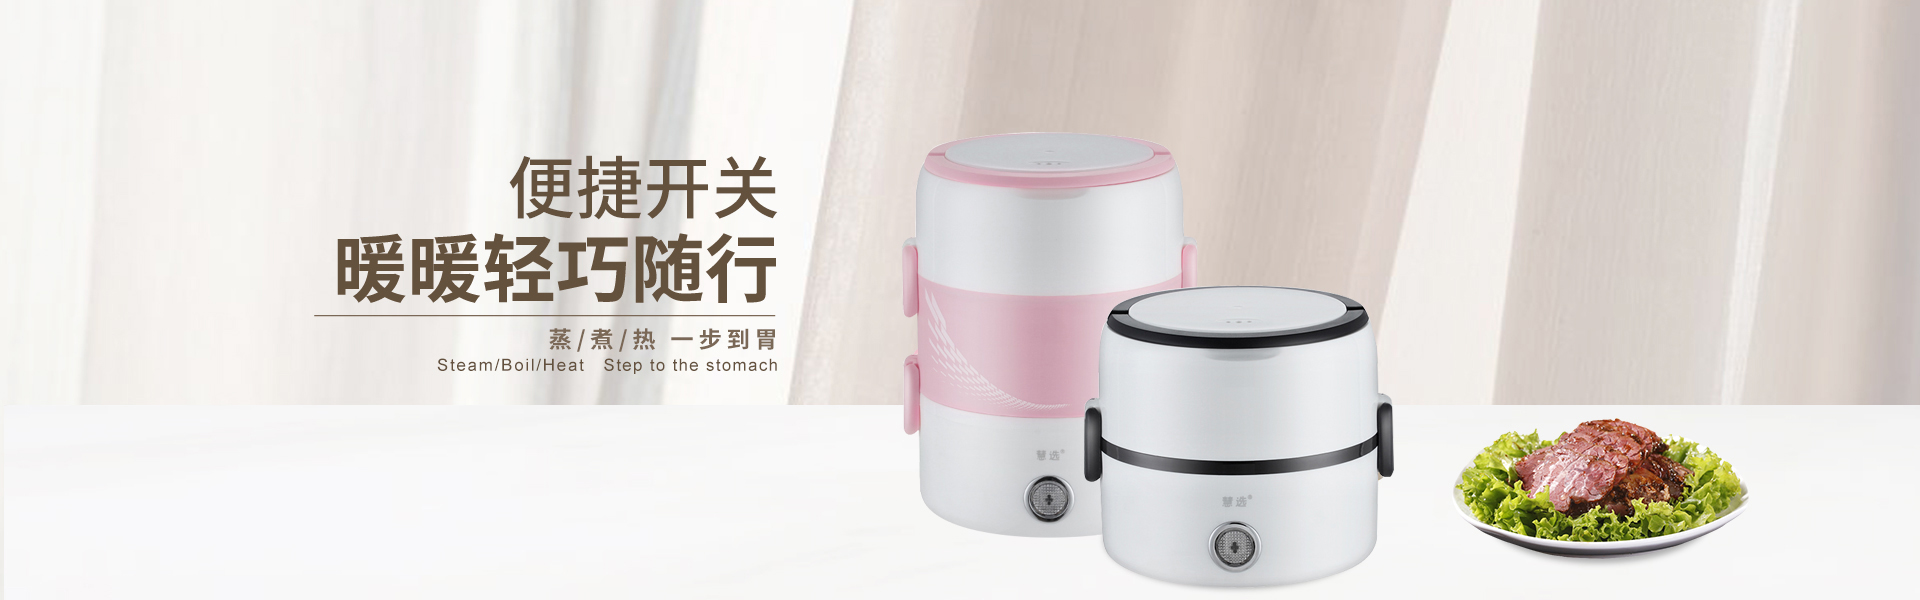
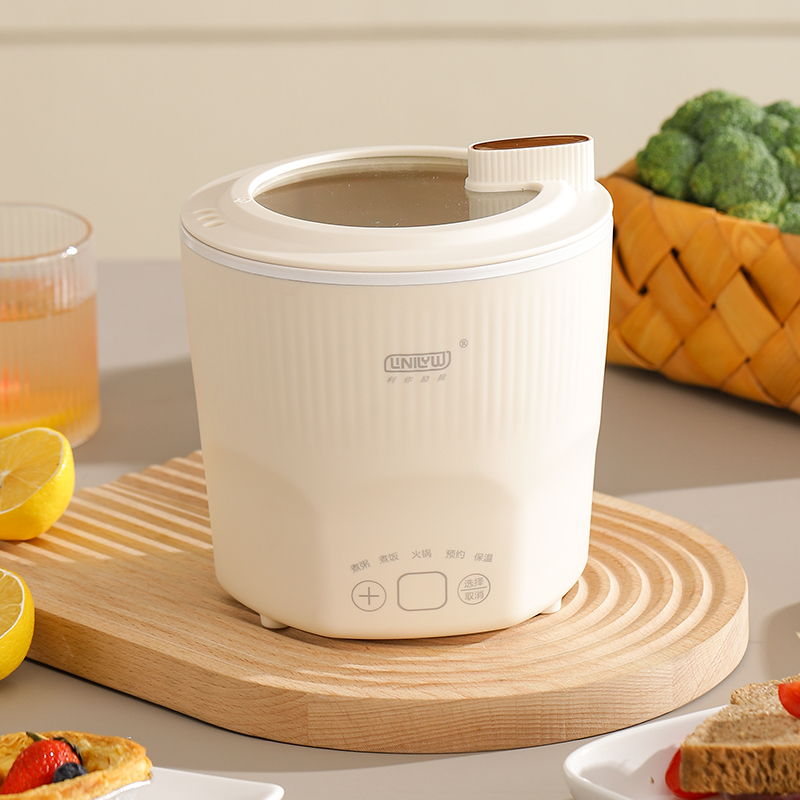
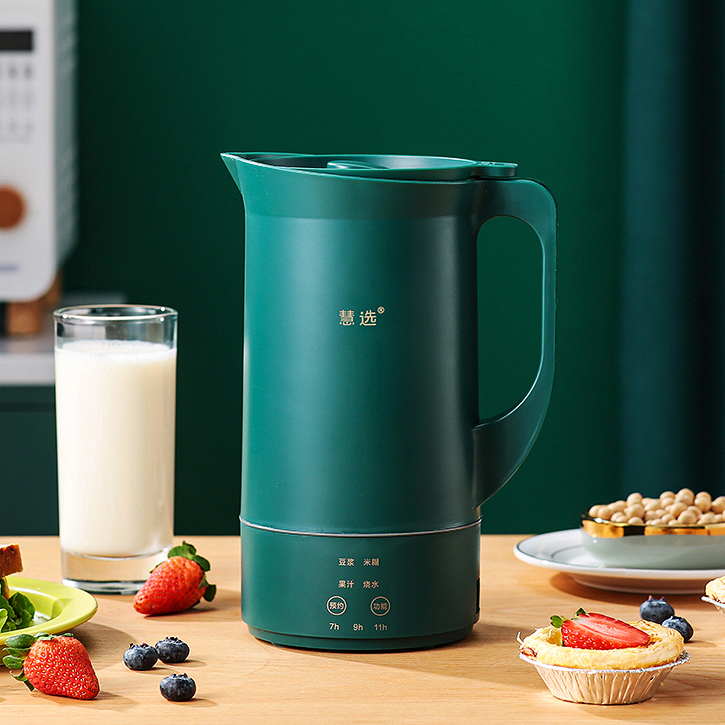
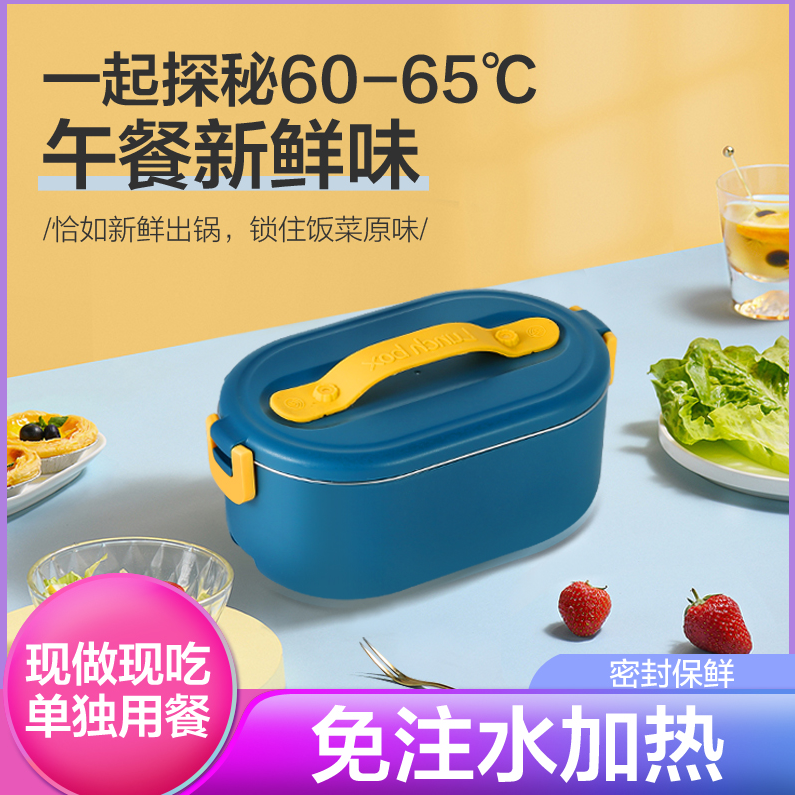
Build a Flux Capacitor Replica
Last Updated (Tuesday, 07 May 2013 20:21) Written by Daniel Livingston
Well, I had finally decided to build a Back To The Future - Flux Capacitor prop replica. I put it off for some time because of so many other projects. My last project was my Lost in Space B9 Robot and that took over 4 years to build. During that project, I learned how to mold, cast and work with many different types of materials. Those skills will be put to use on this project. While my wife won't let me display my robot in the living room, I'm hoping I can install the Flux Capacitor in the family vehicle. My goal with this site is to document the process I went through to make my flux capacitor and hopefully help others along the way.
Check out the build progress I went through on the menu at the left. Please let me know what you think of my site and how I can make it better. Send me you questions and comments. Pictures, I want pictures of your Flux Capacitor replicas, even before you are done. Let me know if you've found a better way of building any of the parts. Above is my nephew Ben when he opened my prototype Flux Capacitor replica which I had given to him as a gift. That story is below.

Be sure to check out my newly added liquid Silicone Molding Guide where I show you how to make molds of you Flux Capacitor parts and create Plastic Resin Copies of them.
I've also added a new Flux Capacitor Store full of cool Back to the Future related paraphernalia, including shirts and DVDs and collectibles. I also have available some Flux Capacitor Parts - Check it out here.
Written by Daniel Livingston
The two months before Christmas were very busy. I'd been wanting to finish my first Flux Capacitor to give as a Xmas present for my nephew Ben. I can happily say that it was finished in time and was a big hit on Christmas. He was very surprised when he opened the packaged and could not believe what was inside.

I took many pictures over the last several weeks of construction and I will be updating all of the sections with the final details. There are a few tweaks I will be making on my next one (for me) but I could not be more pleased with how it turned out. Keep checking back. If you have any specific questions, please let me know.
Last Updated (Wednesday, 17 April 2013 11:40) Written by Daniel Livingston
As winter is upon us, I decided to start my second Flux Capacitor replica. I learned plenty building my first (which went to my nephew Ben). I plan on updating my web site with newer, more detailed pictures of construction details I may have glossed over the first time. I've have also had requests to supply some parts and while I don't really want to spend all my spare time making parts for others, I may offer a few, starting first with the solenoid bases, since I made a mold of my replicas. Let me know if you are interested.

Last Updated (Wednesday, 05 June 2013 14:34) Written by Daniel Livingston
Just how many lights are there under each of the fluxing tubes? I just don't know. There are at least 4, but there may be as many as 6 from what I've read on other BTTF web sites. While I'm sure having 3 would probably be fine, if I'm making the circuit from scratch, adding more lights is not a big deal.

I decided a little investigative work was in order. I popped in my BTTF DVD and imported the Flux Capacitor clip into my video editing software. It didn't take to long to find the right scene. There is a key moment when Doc Brown points at the Flux Capacitor for a few seconds and explains to Marty, holding the camera how time travel works..
I captured the clip and looked at several consecutive frames showing the fluxing lights. Now, I know all about film speeds and frame rates from 20+ years working for Kodak and there's just so much you can gather from looking at a DVD, frame by frame. I figured I'd count the lights I can see in each frame and plot their positions.
Click on the picture above for a closer look. I stepped through every frame I could and marked each light location that I saw. Except for occasionally seeing two lights at once (one turning on and one turning off) I never saw more than the 4 positions I have circled. Even considering frame rates and the possibility of missing a light, I'm not sure there are more than 4.
If you look at the spacing between the 3rd & 4th light (counting down from the top right) there may be enough room for another one. Also the first three overlap a little but #4 is all by itself.
So, the jury may still be out for some, but I've settled on 4 lights.
Last Updated (Monday, 08 April 2013 22:07) Written by Daniel Livingston

I started by identifying the electrical box that was used for the real Flux Capacitor. Several web site seem to agree that it is a still available Stahlin Electrical box model J1210HPL. That means it is a Fiberglass 12 in. x 10 in. box. I located one on eBay (where else) for about $70. It's not the correct color and needs a window cut in it, but it's the right one. It's also the perfect starting point.


